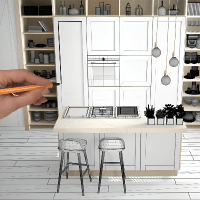


Love your kitchen, but hate the color? Maybe your family just wants a simple update to feel comfortable until you’re ready to remodel or sell. Whatever the case may be, learning how to re-paint kitchen cabinets is a great way to transform your kitchen in little time, with little investment.

Taking on this project will involve hard work, but some homeowners knock this out in one weekend depending on kitchen size if they’re diligent. The average cost for painting your own cabinets is a few hundred dollars. For those who want an upgraded space, add in lighting, cabinet hardware, soft-close hinges and soft-close drawer glides for a ‘new kitchen’ experience.
Table of Contents
- How to Paint Kitchen Cabinets
- How to Install New Cabinet Hardware
- How Long Will Painted Cabinets Last?
- What to Consider with DIY Painted Cabinets
- Should You Paint Cabinets or Buy New Cabinets?
- What’s the Best Paint for Cabinets?
- Achieve Your Dream Kitchen Design
Although this project is smaller, it will require preparation and many tools to be successful. Below is a checklist of tools you will need to complete this project.

Tool check list for painting kitchen cabinets including: rags, foam sanding blocks, orbital sander, power drill, pencil, tack cloths, primer, paint, paint brushes, mini roller brushes, paint tray, bags, cabinet cleaning solution, wood filler, putty knife, shop vac, painter’s tape, paint sprayer, box fan, gloves, masks, eye protection.
Make sure you consider the pros and cons of painting kitchen cabinets before diving in. This is a much less expensive way to make a big impact on your kitchen. Painting cabinets will provide an improved look and experience in the kitchen. It can also make your home more visually attractive to potential buyers with updated, trendy cabinet colors and cabinet hardware.
On the other hand, this will take some elbow grease and you need to be okay investing a weekend or more into cleaning, re-finishing cabinets and putting everything back together. Additionally, you need to be prepared to add ‘contractor’ and ‘project manager’ to your already lengthy list of titles.
If you are prepared to invest time, money and effort into a small kitchen remodel, then let’s dive into how to paint kitchen cabinets.
How to Paint Kitchen Cabinets
1. Create Your Workstation

At the start of your project, set up a proper workstation. This could be anything from a kitchen table covered with a tarp to sawhorses with plywood. The key is to have enough space to set out all your tools including paint cans, paint trays, brushes and more. During the refinishing process you will constantly need to re-fill your trays with paint and primer. Having a large work surface for all the dirty work will make this process much easier.
2. Prepare Your Space

Getting your kitchen ready for this DIY project is the least exciting part, but still important. Take this time to clean out all the kitchen cabinets and clear the room of furniture and decor. Once these items are in safe locations, tarp off the room covering free-standing appliances, vents and doorways to minimize the mess. The better you prepare your kitchen, the easier it will be to clean up after.
3. Clean Your Cabinets

Prepping your cabinet’s surface starts with cleaning. Remove all grease, grime, oils and dirt before using any primer. If standard cleaning agents are not working, use trisodium phosphate (TSP) which can be found in local big-box and hardware stores. This step is essential for the success of your project and can affect paint adhesion, so make sure you remove all the grime. According to Architectural Digest, “eighty percent of all kitchen painting complaints are due to lack of surface prep.”
4. Remove Doors & Old Hardware

Take off all the cabinet doors, drawers, hinges, glides, cabinet handles, shelves and shelf clips. If you plan to re-use any of these items, put them somewhere safe and mark their location in the kitchen. Additionally, map out the locations of each door and drawer. This will make assembling the new kitchen much simpler and minimize confusion.
5. Repair Holes and Damage

When the doors and cabinets are clean and free of hardware, use wood filler to repair holes and other damage. If you plan to use the same hinges again, leave the existing hinge holes. For new hinges, fill the old holes for a smooth surface.
Sometimes older cabinets tend to have dents and scratches. This is the perfect time and place to fill these problem areas, so your cabinets look brand-new. Allow the filler enough time to dry. Most wood fillers will turn white when they are dry and ready to sand.
6. Sand Your Cabinets and Doors

Now is the time to decide whether you want to paint the entire cabinet including the interior or stop at the face frame. If you choose not to finish the inside, there’s no need to sand the cabinet interior. Put on your face mask and eye protection before starting. It’s important to protect yourself from inhaling saw dust and paint particles- especially if the original finish was applied prior to 1978.
Start sanding with 60-grit sandpaper whether it’s a foam sanding block or orbital sander. Using an orbital sander will save your arms, so it’s worth the investment. Like cleaning your cabinets, this step is crucial for ideal paint application. Make sure all wood filler is completely smoothed out and flush with the box.
Every inch of the pre-existing finish needs to be sanded for the primer and paint to apply properly. This includes the cabinet face frame and box and the front and back of all doors and drawers. An optional next step is to sand with a finer grit sandpaper to smooth out the surface, but this is not necessary.
7. Clean the Whole Room

Grab your cleaning supplies to start cleaning the room. For those of you who don’t plan to sand between coats, use your shop vac to remove dust particles and start wiping down walls with damp rags. After the shop vac has removed most of the mess, use tack cloths to wipe down the interior and exterior of all cabinet boxes and doors to catch any fine particles.
If you’re not painting the inside of your cabinets, now is a good time to tape the interior cabinet edges behind the face frame. Taping will help you avoid swiping the interior with your paint brush. By doing this, you will make painting face frames much easier and faster in the long run.
8. Prime Your Cabinets

Now things really start getting exciting. Applying primer is when you start to see the difference. Think of priming like painting a wall. Start by using your angled brush to trim edges and moldings, then fill in and work your way towards stiles and rails. As a rule, test the primer in an inconspicuous area first. If it bubbles, that means the surface was not prepped well enough and it’s time to start over. However, if there are no bubbles, your cabinets are ready to prime.
When one area is trimmed, use your mini roller brush or tool of choice to fill in the larger areas. Roller brushes are a great way to cover more surface area in less time. Before finishing the cabinet or door, brush the primer in the direction of the wood grain. Take your time for better, more professional-looking results. If you’re moving too quickly it might show.
BONUS TIP
Some homeowners prefer to sand in between layers with a fine 360-grit sandpaper. Before sanding, check the primer’s use instructions, but this can provide a smoother finish. Use tack cloths to clean up any dust and particles.
9. Paint Your Cabinets

After the primer has been given enough time to dry based on use instructions, it’s time to paint. Follow the paint brand’s recommendations on how many layers to use and allow each layer enough time to dry. Like priming, cut in the outer edges and fill in with the roller as you go.
For a professional look, invest in a paint sprayer. This will require more prep time to tarp off areas to prevent overspray, but the investment will be worth it. If you are new to paint sprayers, test out your skills on a sheet of plywood before finishing cabinets. As you work your way through the kitchen, check every panel and face frame for drips and smooth them out before they dry.
10. Re-Assemble Your Kitchen

The best part of any project is the end. Now that you have put in hard work and invested time and energy, the results are finally here. Remove all the painter’s tape and start assembling all the parts of the kitchen. This includes installing hinges and glides along with doors and drawer fronts. Once these pieces are in place, add the jewelry to your kitchen- cabinet hardware. After you have finished installing everything, it’s time to move back in.
How to Install New Cabinet Hardware
Are you putting new handles on your newly painted cabinets? By now, you have prepped, sanded, painted and primed so drilling through your newly painted cabinets can be nerve-wracking. Get it right the first time by using a cabinet hardware template or homemade jig. Hardware templates can easily be purchased at most hardware and big-box stores.

Templates are inexpensive and provide a wide range of placement options to help you drill in the same spot every time. This includes placements for knobs, pulls, bin pulls, latches and finger pulls. If you decide to make your own jig, the photo above shows the most common placement for a knob, but can also be used as the lowest starting point for pulls.
Start by marking the center point where the stile and rail of the door meet. If you purchased pulls, measure the distance between the holes to locate where to drill the top hole. Measure the distance from the bottom hole to where the top hole will be and mark the cabinet. Hold up your cabinet hardware against your markings to double-check its location.
Drill through your cabinet markings with a 3/16-inch drill bit and do another dry-fit test with your hardware. Once you have verified the hardware fits, place your homemade jig on the back of the door and drill through again creating holes in your jig. Now, this jig can be used on all your cabinet doors.
Drawers are slightly different when it comes to hardware location. Typically, all hardware is in the center of the drawer front, but a template will help you find the best placement for pulls. Once you have drilled all the holes, start installing your cabinet hardware!
How Long Will Painted Cabinets Last?
New paint is most vulnerable to damage in the first 3 – 4 weeks before it’s cured. The longer you allow it to dry, the more durable it will be. Additionally, the lifespan of painted cabinets is also determined by the type of paint that’s used and how often the cabinets are cleaned.
High-gloss or semi-gloss finishes tend to dry very quickly and create a harder protective layer. Once the paint has cured and you have moved back in, clean your cabinets on a regular basis. Grease and oils can easily start to compromise the integrity of any painted finish.
Overall, you will get a high return on investment by painting kitchen cabinets. If you properly prep them, use high-quality finishes and keep up good cleaning habits, your newly painted cabinets can last up to 10 years.
What to Consider with DIY Painted Cabinets

Allow Enough Dry Time
Getting started on your DIY kitchen project is exciting and it’s hard to wait. Sometimes waiting is the difference between a beautiful and durable cabinet finish, or a vulnerable and weak finish. Allow enough time during each step for every material to dry. This includes wood filler, primer and paint. Each of these will have its own wait times and it’s best to allow extra time for a durable finish.
No Time Wasted
Since you will be watching paint dry so to speak, fill your time with smaller tasks to keep your project moving forward. Wash brushes and rollers, clean up the room, or make sure your workstation is up to date with the materials you need. No time needs to be wasted while you wait.
Which Tool is Best?
Do you know which tool is best for paint application? Bristle brushes, rollers and paint sprayers are all great options for different reasons. Let’s explore what you can expect with each option below.
Bristle brushes are great for trimming and getting into tight angles and corners. They carry a lot of paint and are good at covering surfaces in one swipe. Because of the nature of brushes, they will leave the inevitable brush marks creating streaks in the texture of the paint finish.
Paint rollers are another useful tool that will save you time. This paint applicator absorbs a large amount of paint and can cover lots of surface area in less time. Unlike the brush, rollers can’t access hard to reach areas, so you will still need a brush. Roller brushes also leave an orange peel-like texture.
Paint sprayers are more expensive than the previous options, but well worth it. By far this applicator will give you the smoothest, most professional look. Since this tool literally sprays paint, you will need to tape off every area you don’t want paint on. Preparation is a little more labor intensive with this option, but still worth the effort for quicker coats of paint and smooth results.
Every project and homeowner are different, so choose which tools meet your needs best without going over budget.
Should You Paint Cabinets or Buy New Cabinets?
Deciding to paint your cabinets or buy new is completely up to you. The most common concern surrounding this question is the budget. Full-scale kitchen remodels can include new cabinets, countertops, appliances, electrical, plumbing and more, so the price range is wide. The national average cost to remodel a kitchen is about $26,268, but it could be much lower or higher depending on your product choices.
Painting cabinets on the other hand is typically a few hundred dollars in cost. For most people, this will be a DIY kitchen remodel that involves a lot of hard work and time. These smaller DIY projects can also include other upgrades like new lighting, backsplash tile, wall paint and even fresh countertops. Although smaller, this project can still make a large impact on the visual appeal of your kitchen.
Think about what you want most with this kitchen remodel. Do you prefer something inexpensive that can be finished in one weekend, but involves hard work and leaves you with the same cabinet storage? Or do you prefer the long-term option that offers customized features, but costs much more out of pocket? The choice is yours.
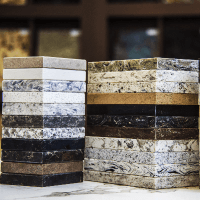
What’s the Best Paint for Cabinets?
Kitchens are one of the busiest, high-touch areas of the home and for good reason. All kinds of activities take place in the kitchen because it’s the heart of every home. With the wear and tear it experiences, it’s important to choose the best paint for cabinets.
Each type of paint has different pros and cons including how it ages, whether it stands up to traffic and how easy it is to work with during application. An important note- take extra time to confirm your primer will be compatible with the paint you choose. Some primers are compatible with latex and others with oil-based paints. If the wrong paint and primer duo are mixed, the finish could crack or even worse, not stick.
Below are three cabinet paint options. Choose which paint works best with your preferences and the activity in your household.

Acrylic-Based Latex Paint
If you want a durable finish that’s fast-drying and easy to clean, acrylic-based latex is a great option. This product will easily wipe clean without affecting the finish. It looks beautiful and maintains color over time while binding well (because of the acrylic) to surface it’s applied to. Soap and water are all you need for clean-up.
Oil-Based Paint
Oil-based paint has the most binder making it the strongest, most durable finish. However, it tends to have VOC’s (Volatile Organic Compounds) which can be harmful to health. Cleaning up is not easy, and it takes longer to dry. This option also needs lots of airflow which can be difficult during projects.
Water-Based Alkyd Paint
Water-based alkyd paint has the same strength as oil-based paints without the harmful VOC’s. This product is a mixture of oil and acrylic paint making it much more durable. Clean-up is also convenient with simple soap and water.
When you have decided which paint to use, apply 2 - 3 coats or as directed by the paint manufacturer. However, sometimes you can get away with one and a coat of primer depending on the color. Just remember multiple coats leads to a more durable finish.
To apply paint, use a high-quality 3 – 4 inch square brush and a 2-½ - 3-inch angled brush to help get into corners and tight angles. Synthetic bristle brushes are best for latex and natural bristle brushes are ideal for oil-based paints.
Achieve Your Dream Kitchen Design
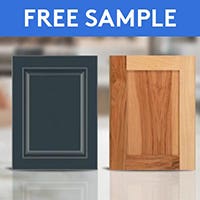
Painting kitchen cabinets is a great DIY project to consider. It stirs creativity and truly helps you customize the look of your home for minimal cost. But have you ever wondered how much new kitchen cabinets for your home would cost? Reach out to a CliqStudios designer.
We provide free expert design services and cabinets in every style and budget. Our designers are happy to walk you through every step to personalize your kitchen design and provide a quote. With their knowledge and your inspiration, your dream kitchen design might be possible right now. Who knows, you might be surprised...
Talk to a CliqStudios designer for a kitchen cabinet quote today!
Frequently Asked Question's
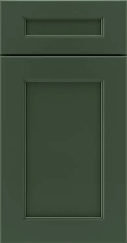
How do I choose the right paint color?
Choosing the perfect color for your kitchen cabinets depends on your preferences and plan for living in your home. Consider whether you're preparing to sell or staying in your home. If you’re staying, choose a color you enjoy. To find kitchen cabinet colors you enjoy, look around your home and see what colors show up in your decor, pillows and furniture. This is a great way to find potential color options for your kitchen.
Home is where you live life, raise family and enjoy friends so find a color that makes you feel comfortable and excited to be in your own home. If you want something bold like blue or red, but painting your cabinets this color is nerve-wracking, try using it as an accent color in decor.
The next step is to identify whether this remodel is a short-term or long-term option. Painting your kitchen cabinets for long-term enjoyment means you should think about timeless colors. Typically, these colors include varying shades of white, taupe, black, green and neutral wood tones.
Do I need to sand cabinets before painting?
Yes, sanding kitchen cabinets is an essential step in preparing them to be primed and painted. Every inch of the cabinet needs to be sanded so the primer and paint will adhere properly. Take your time with this step because this will be the foundation for your finish.
Start sanding with 60-grit sandpaper whether it’s a foam sanding block or orbital sander. Using an orbital sander will save your arms, so it’s worth the investment. Like cleaning your cabinets, this step is crucial for ideal paint application. Make sure all wood filler is completely smoothed out and flush with the box.
Every inch of the pre-existing finish needs to be sanded for the primer and paint to apply properly. This includes the cabinet face frame and box and the front and back of all doors and drawers. An optional next step is to sand with a finer grit sandpaper to smooth out the surface, but this is not necessary.
What painting supplies do I need to paint cabinets?
To paint kitchen cabinets, you will need many supplies before you can start. Below is a list of the most used paint supplies for cabinets from eye protection and face masks to sanding blocks.
- Rags
- Foam sanding blocks
- Orbital sander
- Power drill
- Pencil
- Tack cloths
- Primer
- Paint
- Paint brushes
- Mini roller brushes
- Paint tray
- Bags
- Cabinet cleaning solution
- Wood filler
- Putty knife
- Shop vac
- Painter’s tape
- Paint sprayer
- Box fan
- Gloves
- Masks
- Eye protection
