Base price for 20 feet of cabinets in this style and finish.


SHOP OAK KITCHEN CABINETS
View oak kitchen cabinets in multiple styles and a variety of finishes. Find exactly what you need from the white oak look to dramatic dark oak stains. Explore beautiful oak cabinets for your dream kitchen now.
- Style
- Line
- Wood Species
- Finish
-
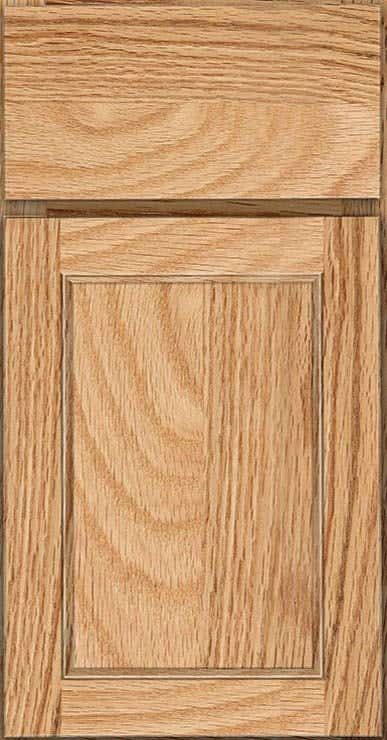
Fitzgerald
Craftsman Quartersawn Oak Wood Starting Kitchen Price:?What is a Starting Price?
Base price for 20 feet of cabinets in this style and finish.
$8,084.58 $9,511.27 As Low As $201.15 /Month*15% OFFSHIPPING TIME: 7 to 9 weeksStains: Natural- +14 More
Paints:


Are Oak Cabinets Coming Back in Style?
Oak kitchen cabinets had a large upswing in popularity in the 90’s and early 2000’s with the golden oak finish. But this finish became overused and in turn, homeowners got sick of oak altogether. In more recent years, more oak finishes have come out in lighter tones making it a popular choice for modern kitchens.
Oak wood is a very durable wood species with many benefits. Although it’s heavy, oak can resist dents, scratches and water making it a great choice for kitchen cabinets and furniture. White oak and red oak are the most common choices used for cabinets and furniture which provide different looks.
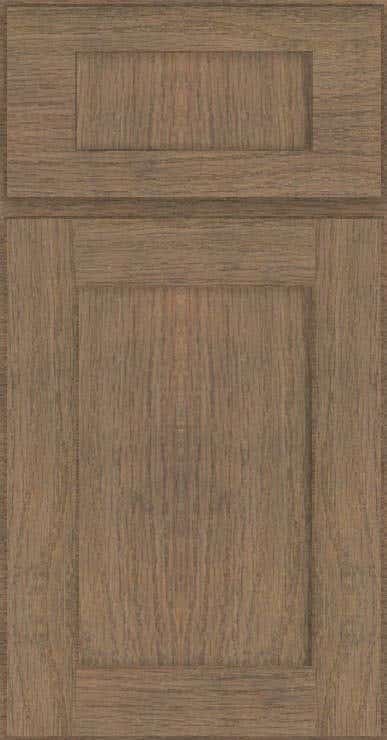
White oak is a straight-grain hardwood with light to medium-brown coloring. As it ages, white oak lightens into a soft golden tone. In contrast, red oak is a slightly softer straight-grain hardwood with a textured light brown and reddish-pink tone. Red oak is much easier to access, making it less expensive.
Overall, oak kitchen cabinets are rapidly regaining popularity. New door styles and modern colors are making this product a more timeless choice for homeowners everywhere.
Paint Colors That Go With Oak Cabinets
Choosing the perfect shade of paint can be tricky when you’re trying to match wood tones. It’s all about complimenting your oak kitchen cabinet’s undertones. Color can either create peace and energy or a glaring color scheme that clashes. To prevent the wrong color decision, let’s look at what paint colors go with oak cabinets.
Reddish-Pink Oak
Calm down those bold reddish-pink hues with colors like warm taupe and beige or gray with purple undertones.
Yellow Oak
Bring yellow cabinets down to earth with calm complimenting tones like cream, tan and greige paints.
White Oak
Add interest to white oak with warm or cool tones. Varying shades of blue, white, green, black, slate gray and taupe will either add warmth or contrast.
Consider what type of contrast you would like to create. Bold colors will create a more dramatic color scheme while subtle colors will make your cabinets the star of the show. Explore CliqStudios oak kitchen cabinets!
What Is Quartersawn Oak?
There are many ways to cut wood for furniture and cabinets. One of which is the process that creates the quartersawn look. Oak wood is a popular wood species for this cut because of its rugged straight-grain appearance giving it a distinct look.
First, the log is cut into quarters lengthwise. After that each quarter is rotated and cut revealing the textured vertical grains. The results are a stunning piece of furniture or cabinet that is even more durable and resistant to warping.
Explore CliqStudios oak kitchen cabinets and quartersawn door styles!
How to Refinish Oak Cabinets
Give your kitchen a new look by refinishing your oak cabinets. This is a great cost-effective way to bring new life to your kitchen. Oak cabinets can either be painted or stained for a new look. Keep in mind that oak wood has a very rugged grain pattern, so painted finishes will still show this texture through the finish. Learn the steps to re-paint or re-stain your oak kitchen cabinets below.
Painted Oak Cabinets
- Step 1: Remove all doors, drawer fronts and cabinet hardware
- Step 2: Clean out the kitchen packing everything away in boxes
- Step 3: Remove existing finish from all doors, drawer fronts and cabinet boxes
- Step 4: Use wood filler to repair any damaged areas or holes
- Step 5: Roughly sand all doors, drawers, and cabinet boxes then clean with a tack cloth
- Step 6: Prime the cabinets
- Step 7: Paint the cabinets
Most oak kitchen cabinets will require a few coats of paint. Follow all the manufacturer instructions for applying primer and paint. Dry time can also vary based on the brand and type of paint as well. Before getting started, make sure the primer and paint are compatible to prevent finishing issues.
Stained Oak Cabinets
- Step 1: Remove all doors, drawer fronts and cabinet hardware
- Step 2: Clean out the kitchen packing everything away in boxes
- Step 3: Remove existing finish from all doors, drawer fronts and cabinet boxes
- Step 4: Use wood filler to repair and damaged areas or holes
- Step 5: Sand all doors, drawers, and cabinet boxes then clean with tack cloth
- Step 6: Apply the wood sealer
- Step 7: Apply your preferred stain
- Step 8: Apply a varnish to protect the new finish
If the new stain does not look dark enough, feel free to add a second coat during step number 5 of the finishing process. Follow all the sealer, stain and varnish manufacturer instructions for application and dry time, then re-assemble your cabinetry.
Oak Cabinet Kitchen Ideas


Frequently Asked Questions
What flooring goes with oak cabinets?
The flooring that goes with oak cabinets will vary based on which type of oak and stain you choose. Every kitchen design should have some sort of contrast. Because of this, darker oak stains will pair nicely with medium to light wood floors. Oak kitchens with medium-tone stains will also look nice with lighter wood flooring or LVP.
If you would like a different material, explore light or multi-colored natural stone. Limestone and travertine are beautiful options that will make your space look larger and provide visual texture. Slate will also add a stunning rustic quality to the kitchen.
What countertops go with oak cabinets?
The most popular countertops for oak cabinets are quartz, granite and quartzite. Quartz is a stunning man-made countertop consisting of 93 percent quartz rock and 7 percent resin. It’s waterproof, stain proof, heat resistant, scratch resistant and antimicrobial. Most people love quartz because it’s both durable and offered in many convincing stone-like designs.
Quartzite and granite are both natural stones quarried from the earth. Each of these materials has unexpected and stunning natural veins and unique color variations. They are also incredibly durable, heat resistant and scratch resistant. Granite does need to be sealed, however most come pre-sealed in today’s market.
How does oak wood age?
All types of wood age differently. Most oak cabinetry and furniture are made from red and white oak. White oak starts in a light tan tone, but ages into a lighter golden hue. Red oak, however, starts lighter with reddish-pink undertones and develops into a richer red over time. Explore CliqStudios oak cabinets for your kitchen remodel now!
Can oak cabinets be painted?
Yes, oak cabinets can be painted in a variety of shades. It’s important to know that even with paint, the rough texture of oak wood will still show through on the final product. This is a beautiful look that adds an organic element to an otherwise modern kitchen.
Follow the instructions below to paint your oak kitchen cabinets.
Step 1: Remove all doors, drawer fronts and cabinet hardware
Step 2: Clean out the kitchen packing everything away in boxes
Step 3: Sand and rough up the existing finish on all doors, drawer fronts and cabinet boxes
Step 4: Use wood filler to repair any damaged areas or holes
Step 5: Roughly sand all doors, drawers, and cabinet boxes then clean with tack cloth
Step 6: Prime the cabinets
Step 7: Paint the cabinets
Most oak kitchen cabinets will require a few coats of paint. Follow all the manufacturer instructions for applying primer and paint. Dry time can also vary based on the brand and type of paint as well. Before getting started, make sure the primer and paint are compatible to prevent finishing issues.
Can oak cabinets be stained lighter?
Yes, oak cabinets can be stained lighter. To achieve a lighter finish, it’s common to apply bleach to the wood surfaces. However, to successfully lighten your oak cabinets, the previous finish needs to be completely removed. Use wood stripper to remove the old finish followed by thorough sanding.
Apply bleach to a towel and wipe down the wood surfaces. Make sure to wear rubber gloves and protective clothing during this process. When you are satisfied with the color, use a clear seal on the cabinets. Once everything is dry, re-install all your doors and drawers.
