
The New Kitchen Takes Form
We have been following CliqStudios designer Tessa and Jake as they remodel their kitchen. Cabinet installation was a group project, keeping Tessa, Jake and Tessa’s dad busy for weeks. In this post, see how the three work together to put in the cabinets. In addition to creating a beautiful space from semi-custom cabinetry.
Leveling Cabinets
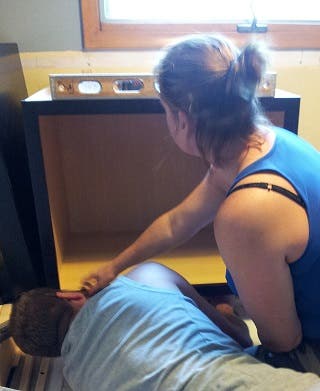
As a team, they leveled the base cabinets so they would provide a strong base for the countertop. Their house was 50+ years old, and the floors were uneven. However, the group was surprised at the degree of change—as much as ¼ inch across a single cabinet unit.
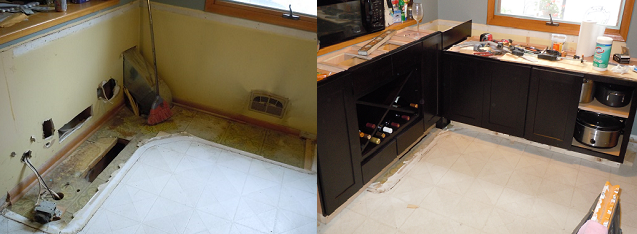
They removed the bench in the old breakfast nook space. It revealed a huge surprise—a large duct funneling heat into the neighboring addition. CliqStudios’ Signature cabinets are built with all-plywood construction. It would have been pretty simple to cut a channel in a corner unit without destroying its original structure. However, no cut or rebuild was necessary. The base cabinets approach the corner at different heights. Tessa had designed the space as blank; there was no inside corner cabinet!
Modifications
Some changes were necessary to lower the heat vent to floor level. Then, build ductwork to run it forward to the front of the toekick. As well as supporting the cabinet around the new vent.


Notice how the wine rack creates a graceful transition between food prep and entertainment areas. A filler panel bridges the gap left by two levels of cabinetry. Furniture drawers above and below the wine rack provide storage for barware and entertaining items.
The beverage station, refrigerator and pantry cabinets would share a wall that stepped down in depth. This presented another set of design and installation challenges. But the problem was solved by moving from the refrigerator to beverage center with a finished end panel and spacer. Tessa’s dad had grown tired of working around her special design features, but isn’t the result beautiful?
Lessons Learned
Tessa’s learned she needs to do more thorough planning. This way, all stages of construction flow smoothly and materials can be stored or installed as they arrive. Her example: she didn’t realize her flooring choice was special-order, and wouldn’t arrive before the cabinet installation. The group would be able to install the flooring, but it would present an extra challenge.
The time and money being spent on the project is more than Tessa originally thought. For example, the time it takes to adjust hinges and drawer glides. This turned out to be a skill that has a a bit of a learning curve.
Hands-on installation experience also brought home to her as a designer the importance of allowing space. The installer needs it to get a drill in a corner or have access to make changes.
Finally, Tessa points out that it’s good to live near a hardware store or home center.
Follow the links below to follow Tessa and Jake’s experience and see the finished product.
- “Do it Right and Do it Once”: Tessa’s Remodel, Chapter 1
- Personalizing a Kitchen With Design: Tessa’s Remodel, Chapter 2
- Count You Cabinets Before Tearing Out Your Kitchen: Tessa’s Remodel, Chapter 3
- The Final Chapter: A Designer’s Kitchen
Do you have any questions or suggestions about the remodel timeline or installation process? Post them here, or call our Design Studio at 888-994-8405 for assistance.


