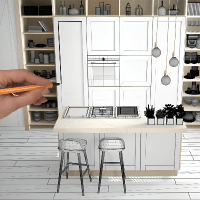


Are you thinking about building and installing your own kitchen island? Although it may be a smaller section of the kitchen, a project like this can still require days to weeks of your time as well as lots of hard work. Anyone considering a project like this needs to have great DIY skills and a large set of tools to go with it, so carefully consider whether this will work for you. To get started, here’s a list of the tools and supplies you will need to build your new kitchen island:

Necessary Tools
- Kitchen cabinet floor plans
- Safety glasses
- 4’ carpenter’s level
- Shims
- Power drill
- Drill bit set
- Beeswax
- #8 2-1/2” Panhead cabinet screw (used to affix cabinets to floor)
- #8 2-1/2” Trim head screw (used to affix cabinets to each other)
- Measuring tape
- Rubber padded clamps (minimum 2)
- Screw driver
- Chalk line
- Stud finder
- Framing square
- Miter saw
- Pencil
- Nail gun
*Disclaimer*
The following instructions on how to build a kitchen island are for wood frame construction only. The materials needed to secure cabinets to steel or concrete may change.
How to Get Started on Your Kitchen Island

Prep Work
Talk To a Designer
Every beautiful kitchen starts with a thoughtful and effective floor plan. Start by speaking with a designer if you’re not experienced in laying out cabinet floor plans. Designers can be great resources with their breadth of knowledge on industry trends, codes, space planning, and best practices. If that’s not enough, designers are great at catching errors whether it’s design related or the wrong appliance size.
Design Your Kitchen Island
If you decide to partner with a kitchen designer over DIY design, you can expect a few things. First, your designer will talk to you about the style, preferences, and types of storage you’re looking for, along with any appliances you may be adding in. Once that information is put together and finalized, they will send you a final design packet. This includes a 3D-colored perspective, floor plan, applicable elevations, and any additional perspectives of the island.
Make sure the kitchen island design includes items you want and need. This may be baseboard molding for a furniture look, decorative doors and open bookshelf cabinets for the ends, or interior cabinet accessories. If you’re going to live in this home long-term, make a point to invest more on upgrades that will help your kitchen function well. These items could include roll-out trays, pots and pans drawers, or even wine racks.
Maybe you love entertaining, so wine storage is a necessity. Use the beauty of wine cubby cabinets to create focal points in your kitchen island or utilize them as countertop supports on the back. Creating interest as well as function in your new island is virtually limitless. Look at all the options available to be confident in your choices.
Kitchen designers can certainly take your wish list and recommend where to put these pieces, but think about what works best for you. Does it make more sense to place the pots and pans cabinet by the refrigerator or near the range? Maybe the microwave base cabinet should be on the outskirts of the kitchen island, so hungry family members aren’t in the middle of your workspace.
Most of all, kitchen islands need to fit within the space provided. If the island is too oversized for the sake of gaining as much storage as possible, the design will feel heavy and very cramped. A good way to confidently design your kitchen island is by looking at the surrounding walkway. If the walkways remain a minimum of 36-42” wide on every side and stay within the bounds of other kitchen cabinets, you can feel confident the design works.
Order & Prepare Space
Placing your cabinet order is the next step. If you need help, a designer will be there to walk you through this simple process. Once your order has been submitted, you will gain access to shipping and tracking information to stay up to date with delivery day.
As delivery day approaches, clear your space so it’s ready to receive your new kitchen island. This means decluttering and creating space for the cabinet boxes or flat packs that will be arriving soon. Additionally, if you plan to replace your flooring during this remodel, CliqStudios recommends doing this before installation day. If this isn’t possible, measure the thickness of the new floor and include that in your measurements when planning installation heights of cabinetry.
Take Inventory & Check Cabinetry
The most important step during delivery is to confirm every piece has arrived. Take inventory based on the quote you or your designer created in addition to the bill of lading the delivery driver gives you. Once everything checks out, open every box to check for damage from transit, or any manufacturer’s defects.
How to Build a Kitchen Island

Installation
Double-check Inventory
There are few things worse than starting installation day only to realize you don’t have all the cabinets and parts you need. Looking over your cabinet order once more may be time-consuming, but it will save you in the long run. Use the kitchen island quote once more to check all the boxes so you can keep the project on track when it’s start time.
Make Safety #1 Priority
Most kitchen islands will have one or more of the following items built in:
- Water
- Gas
- Electrical
To ensure the safety of everyone involved, turn off all water supplies, gas lines, and electric circuit breakers before any of this work starts. You can double-check the electrical by using a circuit tester to confirm it’s shut off. If you’re uncertain or hesitant, please reach out to your utility company or a service professional.
Mark Island Location
Take some time to look at your floor plan and map out where your kitchen island will be placed. You will need the tape measure for this task. Once you have figured out where each corner is, mark it with tape so it’s easy to find. After you have marked each corner, connect the corners by creating the outline of your kitchen island in tape.
Prepare Your Floor
Regardless of whether you ordered assembled or RTA (ready-to-assemble) cabinets, you will want to protect your flooring. Tape down ram board to your floor as a layer of added protection. This will provide you with nice workspace to assemble your kitchen island cabinets or get all assembled cabinetry in place.
Unbox the Cabinetry
Now is the time to unbox all the kitchen island cabinetry. If you purchased RTA cabinets, assemble each cabinet as the box is opened. This is a great way to keep confusion at a minimum while keeping track of parts and hardware. Only assemble the outer boxes leaving the doors, drawers, and accessories out for now to make installation easier.
Set the Island Foundation
Islands needs to be anchored to the floor. There are many ways to do this, and the following is just one of many options. In preparation, use rough 2x2 wood boards (or something similar) cut to fit all 4 sides of the kitchen island, and put them in place with double-sided tape. This will allow you to line the cabinets up over the cleats for a dry fit before screwing the cleats into place. Keep in mind that the toe kick is recessed from the frame and door of the cabinets, and account for the thickness of the toe kick as well.
As you confirm the cleats work in the current placement, use your 4’ carpenter’s level to verify the kitchen island has an even surface. If you find some points are higher than others, use shims where necessary to level it out. When shims and cleats are set, screw them into place so everything is ready when time comes to install your kitchen island.
Place & Install Cabinets
*Disclaimer*
Do not use nails or drywall screws to secure cabinets. They do not possess the strength or holding power that is needed for permanent cabinet installation.
For this example, the kitchen island being installed does not include any appliances or plumbing. Put your cabinets into place after shims and cleats are installed. When they are in place, start by using a clamp to hold the face frames of the first two cabinets together. Before any drilling, use your level to check both cabinets are square and that the frames are aligned correctly. After that’s confirmed, place another clamp further down on the same cabinet to secure them tightly together.
Drill 3/32” pilot holes through the adjoining face frames and sync the drill holes. Next, grab the #8 2-1/2” trim screws and coat the threads in beeswax. Hardwood face frames will give some resistance, so the beeswax helps limit this while preventing the cabinet face frames from cracking due to pressure. Do not tighten the screws all the way until you check once more that cabinets are level and plumb. Repeat this process with the rest of the adjoining cabinetry.
When all cabinets have been screwed together, secure the kitchen island cabinetry to the floor by screwing through the toe kick areas into the cleats. This will provide a solid foundation for the island since it’s not attached to any walls.
Install Plumbing or Electrical
If you’re new to DIY housework or unsure of your capabilities in relation to plumbing and electrical, it’s always best to call a licensed trade professional. This is not the time to do any guess work because it could have serious or potentially dangerous consequences. Instead, have a professional ready to take some work off your hands before or after you’re done installing the kitchen island.
Overall, it’s important to have plumbing installed prior cabinet installation and electrical prior to putting all cabinet doors, drawers, and accessories back on the cabinetry. When this project has been completed, whether you’re adding plumbing for a sink or electrical outlets to stay up to kitchen standards, make sure each door, drawer, and accessory is properly installed and level. Never forget to check your floor plans along the way so you know everything is where it was designed to be.
Apply Decorative Finished Details
Intensive labor is now complete and it’s time to add the finishing touches. The back of your kitchen island will be bare, so find the finished panel that came with your cabinet order. More than likely, you will need to cut the panel to fit, so start by measuring the overall length of cabinetry, mark the panel with a line and make the cut.
Apply finishing nails around the top, bottom, and sides to attach the finished panel to the cabinetry. It’s okay to be somewhat generous with nails to make sure the panel is secure. When that step is completed, start cutting to fit baseboard molding. Lay out which pieces will be used for long and short sides separately so there’s no confusion.
All adjoining corners of molding should be miter cut at a 45-degree angle for a finished look. To achieve this, measure how thick the molding is from front to back and include that increment extra on each of the two ends. This will give you enough overhang to join moldings properly with the next side of the island.
Following baseboard molding is decorative doors. There are a variety of ways they can be installed on a kitchen island, but start by navigating the doors locations either through floor plans or personal preference. Once you know the spacing, apply wood glue to the back. Using clamps, place the first decorative door on top of the finished paneling. When you’ve checked measurements, either use a nail gun minimally on the outside, or shorter screws from the inside of your cabinet to hold it in place.
Finish Cabinet Assembly
Now that all final decorative touches are done, it’s time to finish assembling your kitchen island cabinetry. This means putting doors back on your cabinets and adjusting them to be square, putting drawer boxes back in place, and any interior cabinet accessories like roll-out trays. If you’re not sure how to adjust doors, drawers, and accessories, ask a designer for CliqStudios’ adjustment guide document.
Final Touch-ups
After all cabinet door and drawer adjustments have been made, install the decorative hardware of your choice. You may notice that there are visible nails, minor exposed wood edges on miter cuts, and other knicks in your finish that occurred during installation. This is a great time to use the touch up kit from your order. Any order that includes a sink base receives a free touch up kit.
Nail holes will more than likely need to be filled. To test the touch-up process, start in a discrete or hidden area by applying putty and stain. Warm up the putty stick in your hand or quickly in the microwave so it’s more pliable. Use the putty stick to fill in shallow recesses with a smooth back and forth motion. After the fill is completed, use your finger to smooth it out.
Following putty, grab the stain or paint pen to blend the color with soft, even strokes. This will also require using your finger or a cloth to blend the color. There may be extra paint or stain pooling up, however it’s important to not let any drops or extra color sit on the cabinetry or it will create an uneven finish. This process may need to be repeated several times until the color is saturated enough and blends with the existing finish.
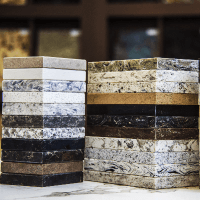
Countertop Installation
Cabinet installation is now complete so it’s time for get ready for countertops. The first step in this process is getting a template. Countertop fabricators will come to your home and take measurements; however, most will not complete a template unless the kitchen island cabinets have already been installed.
This is to prevent mistakes like mis-measuring or fabricating tops based on floorplans which tend to change. Cabinet installation is a large variable, and with so many DIYer’s and installers, measurements can change very easily. Sometimes a filler is missing, or a decorative molding has been added after the measure which elongates the island and makes the nominal overhang now flush with cabinetry.
Additionally, a detail that tends to get overlooked is countertop support. Regardless of your island style, you will need support if your overhang is 9” or more. This is easily solved by countertop brackets, decorative corbels, or supporting cabinets on each end. If you choose supporting cabinets, speak with your designer or fabricator to confirm they will support the full length of your kitchen island countertop.
Alternate Island Options
Bar-height Kitchen Island
Some homeowners prefer a different style of island that includes bar-height seating. In this case, there are a few ways to accomplish that layout. The first choice you need to make is whether you would like more storage on the back of the island or none. Next, find out how much space you have available to increase the depth of your kitchen island. This will help you determine which option is best.
Cabinet Storage
Adding more cabinet storage to your kitchen is a bonus, but how do you do it? Here’s how to build a kitchen island at bar-height. Among many options, use standard 36” tall wall cabinets on the back and build a toe kick underneath. Flank each end of the kitchen island with one small cabinet and this gives you a 12” overhang in the middle providing great room for seating.
The difference in countertop height versus bar height cabinets will leave a gap in between. You can fill this space by using a strong sheet of plywood on the back and then cover it on both sides with finished panels and any additional moldings.
Pony Wall Support
Building a pony wall will require basic 2x4 stud construction to create the framework. Start by building the frame based on the length of your kitchen island. Confirm the location behind the kitchen island along with measurements, then uncover the subfloor to the exact dimensions of the pony wall and its designated position.
Once the pony wall is in place, use fasteners to secure it to the floor. For more stability, stagger the anchors as you work. After the pony wall is secured, it’s time to have trade professionals come in to complete any rough ins for electric, plumbing, or gas.
When all the inner workings of the pony wall are complete, it’s time to put on sheetrock and create openings for any electric or utilities. Mud and smooth out the surface once all panels are in place as preparation for paint. If you plan to add decorative paneling or stone on the sheetrock, it’s not necessary to mud and perfect the surface.
Upon completing the pony wall structure, put all base cabinets into place and follow the same cabinet installation instructions. Start by clamping face frames together and making sure cabinets are level. If they aren’t level use shims where they are needed, then use the #8 2-1/2” screws with the threads coated in beeswax to fasten cabinets together. After all cabinets are screwed together, anchor the cabinets to studs in the pony wall.
Want Appliances in Your Island?

Discover the Options
Now that you know the basics of how to build a kitchen island, appliance installation will make more sense. Appliances are fantastic conveniences in islands, and they are known to improve traffic patterns. Rather than a family member walking through the kitchen to gather what they need, a simple built-in refrigerator, or drink cooler in the island will keep them out of the cooking zone.
Among many options, popular appliance choices range from beverage coolers, dishwashers next to a sink, cooktops, refrigerator drawers, to warming drawers and wine coolers. Regardless of your preference, choose your desired appliances and account for them during the design phase. This way, there’s no need to go back to adjust or completely change the floorplans.
Installing Appliances
Installing built-in appliances to cabinetry does require more advanced finish carpentry and DIY skills. If you are new to DIY, it will be best to call a professional installer for this step. To determine the right size appliance for your kitchen island, talk to a designer. They can provide direction on what sizes will fit based on the existing cabinet layout.
If you are an experienced DIYer, the best place to start is with the appliance manufacturer. They provide specifications and dimensions to help you determine what is required for an appliance to be installed. Typically, this includes things like cut out size for the appliance opening, the size of any overlapping appliance panels on the front and finished height, width, and depth. For any gaps on install information, search the internet for more resources, or hire an installer.
Kitchen Island Styles & Inspiration
Now that we’ve covered how to build a kitchen island, it’s time for some inspiration. Each island has a unique purpose based on the wish list of the homeowner. You will have to decide on a style, what kind of storage you like, any decorative details, if you want display space, or a countertop overhang to eat. For those who haven’t decided, here are 10 kitchen island styles to get you inspired.
Breakfast Bar Island
Breakfast bars are one of the most popular kitchen island features across the board. Not only are they great for morning meals, but also provide a perfect place to entertain friends and family. It can be used to work remotely, study for school, or used as a buffet for serving dinner over the holidays.
Among many shapes and sizes to choose from, the most common is a straight kitchen island with an overhang on the back. Some homeowners choose a curved overhang, or depending on the shape of the island, more than one side may be used for eating. This all-purpose option is hard to beat.
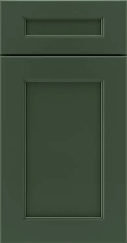
Decorative Style Island
Add some style and flair to your kitchen island with decorative accents. Many of these include decorative doors, baseboard moldings, and sometimes wood furniture legs. Additional moldings and details will dress up your island and provide an upscale, expensive look. This can be accomplished with raised panel doors or more modern shaker styles.
Furniture Style Island
Yet another beautiful option is a furniture style island. This type of kitchen island is the perfect solution for someone who wants their kitchen to ‘blend in’. Furniture style is meant disguise your kitchen by adding more furniture-like features to the cabinetry. Some of these are decorative wood legs, wood feet that nestle into toe kicks, or kitchen islands without a toe kick that are propped up on feet.
Statement Island
Bold colors, dramatic hardware, and eye-catching countertops are the essence of statement islands. This kind of kitchen island is designed to grab your attention. Aspects of a statement island typically consist of things like waterfall countertops, blue or pink cabinets, and very flashy door and drawer pulls. Let your creativity loose on this one to design the attention-drawing island of your dreams.
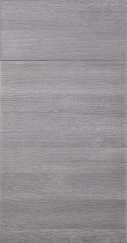
Clean & Minimal Island
Sometimes less is more. Minimal styles provide a calm, peaceful setting that many people enjoy. It’s probably obvious, but this type of design will have little to no detail to maintain clean lines and modern design. Shaker or slab door styles are recommended for this look, and to keep the aesthetic clean, avoid using any type of moldings on the kitchen island.
Extra Storage Island
How do you get even more storage out of an island? Maximizing space starts with the size of your kitchen island. Increase the depth of cabinetry if your kitchen can accommodate it. Make sure you double-check the walkway measurement behind the island to confirm island seating will work with space to walk behind.
Once you’re confident with the clearance, add in 12” deep cabinets on the back to gain shallow storage. If you would rather have more leg room for eating, flank the ends of the kitchen island with cabinets instead. Another option is to fill the back of the island with full depth cabinets to store china, serving dishes, and seasonal kitchen décor.
Rolling Cart Island
Small kitchens will benefit the most from rolling cart islands. If you find yourself short on countertop space but have just enough room in the center of your kitchen, a mobile island might be for you. The convenience of rolling islands is that they can go anywhere there is room.
With that said, larger kitchens can still benefit greatly from a rolling island. This could double as a food prep or baking center for the avid cook. Being able to move this workspace across the kitchen provides major flexibility and convenience.
Display Island
Do you have collectibles, fine china, or souvenirs from special vacations you want to display? Choose a focal point cabinet and add glass doors with LED lighting inside to illuminate your keepsakes. Display cabinets can be added on each end of your kitchen island with full height glass doors. If you decide against a countertop overhang, you could also line the full length of the kitchen island back with glass display cabinets.
More simplistic displays could consist of cookbooks or regular kitchen décor. Use cabinet bookcases on either end or in the middle of your island to add more visual interest. Bookcase cabinets can even be dressed up by adding a decorative valance at the top for a more furniture look.
Eat-in Island Bench
Whether you’re trying to be creative with space or step outside of the typical kitchen and dining layouts, an eat-in island bench is a unique idea. A built-in bench seat can be added to the backside of almost any kitchen island. Add an upholstered cushion to the seat or have it finished the same as your kitchen cabinetry to create a cohesive feel.
Include some back support or cushions to create a comfortable space that family and guests will want to use long-term. All that’s left is to find a beautiful table that fits the scale of the kitchen island and bench, then pull up a few chairs to the opposite side. This layout will draw family in and provide a beautiful kitchen space for entertaining.
Bar-height Island
Bar-height kitchen islands have many benefits. For homeowners who entertain a lot, this is a great way to disguise the mess or chaos of the kitchen during food prep. It can also serve as a buffet for snack foods and desert. If there are children in the house, this can also double as a desk to do homework.
Overall, these are just some of countless ways you can design a kitchen island. If you find it difficult to nail down your style or the type of cabinets you want in an island, talk to a designer. Even if you choose to order on your own, designers can give you guidance on how to pair styles and finishes, as well as proper kitchen guidelines.
How to Choose Your Cabinets
Do you still need to narrow down which kitchen cabinets you’re going with? There are multiple lines to choose from, but not all of them are right for you. To narrow the options, start by choosing a door style you like. Even if multiple lines have that style, it’s a great place to start because that will lead into finishes. Every cabinet line is different, so if it doesn’t have any finishes you like, check it off the list.
Next, figure out the budget for your kitchen island and this will easily weed out some options. Some RTA cabinets can be less expensive depending on the finish and interior accessories that are selected, but other times it can be a wash with assembled cabinets. If you decide to get unassembled RTA cabinetry, make sure the investment of your time into building them is worth the drop in price.
Other features to look at are cabinet construction such as MDF (furniture board) construction, or APC (all-plywood construction). Get whichever best fits your needs and budget. As previously mentioned, interior cabinet accessories are a convenience to have, but will impact the overall cabinet quote. Have a wish list made prior to shopping so you can stay in line with your pre-determined budget while gaining that much needed storage in your kitchen island.
Do You Feel Confident Installing?
Knowing how to build a kitchen island has its benefits. However, if any of this information seems overwhelming to you, or makes you question your abilities, contact a reputable installer in your area and look at quotes. Most inexperienced DIYers end up regretting taking on big projects and end up spending more money in the end because of confusion and mistakes.
There’s no reason to feel bad about hiring someone else to take on a project like this. Once everything is done, you will be happier knowing you didn’t have to deal with the mess, buy more tools, or worry about plumbing and electrical. On the other hand, if you’re experienced at installing cabinets, learning how to build a kitchen island might be an exciting new challenge to you. Just remember, double and triple-check your measurements and materials and you will be on your way to a brand-new, beautiful kitchen island!


