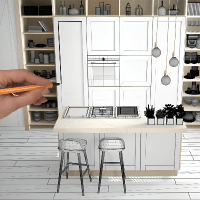


Demolishing your kitchen is an essential step to any remodel, but it isn’t the first one. If you’ve decided on a DIY demolition and will handle the kitchen demolishing work yourself, there are several steps to follow before you start swinging a hammer.
1. Your Remodeling Timeline Before Demolishing Your Kitchen

Before you break out the sledgehammer and start knocking down walls, stop to consider your remodeling timeline. The length of your project can vary greatly depending on the amount of work and your schedule, so make sure you understand when it’s best to start the demolition process.
Setting a timeline for your project will give you a solid foundation for your remodel. It all begins with setting goals for your project. Maybe you want your remodel complete in time for a holiday party. Perhaps you’re looking to create a more functional space before you retire next year. Whatever your goal, make sure you take time to reflect on it.
Next you will want to set the budget for your project and evaluate all of the costs. Common expenses include the products you will be using, who you will hire to do work, such as installation. Assembling your expenses and team will also give you estimates of when you will be receiving products and when contractors are available for working on your space. You will also want to apply for any necessary building permits needed to complete your project.
You will also need to consider product arrival times for your kitchen. It’s best to wait until all of your kitchen materials arrive before beginning your kitchen demolition. Know when you can expect everything to arrive, from appliances to cabinetry. CliqStudios’ cabinetry takes four to six weeks to build and arrive at your doorstep.
Lastly, you will want to get familiar with your space and how you want to change it. Measuring your space and ordering cabinet samples are critical to creating your full vision. Another key asset is speaking with a professional designer to help you envision your finished project.
2. Preparing for Life Without a Kitchen

Is your timeline ready? Don’t start swinging the hammer just yet.
Once you have all of your products and you’ve confirmed that everything is in good condition, you’ll want to establish your temporary kitchen. This will be your center for preparing meals and storing kitchen supplies until your remodel is done. It’s important you have this space ready to go before the demo because once you begin, there’s no turning back.
There are many items that will help your temporary kitchen be a success. For indoor cooking, consider a microwave or hot plate. Or, if the weather is nice during your remodel, consider outdoor grilling. A small refrigerator is another smart choice for easy storage or perishables and leftovers. Alternatively, you can budget for dining out more often during your remodel. Other good items include paper plates, cups and eating utensils to cut down on clean up time.
3. Gathering Your Demolishing Tools

Finally, you’ve established your timeline. Everything is prepped to your remodel. In other words, that means it is hammer time, right? Wait one more moment. Do you have the proper tools for demolishing your kitchen? Gathering your supplies in advance will save you from repeated visits to the hardware store.
Essential tools for a DIY project include:
- Hammer
- Crowbar
- Pry Bar
- Screwdriver
- Sledgehammer
- Putty knife
- Utility knife
- Pliers
- Ladder
- Drop cloth
- Dust masks
- Closed toed shoes or work boots
- Appropriate clothing
- Dumpster (make sure to reserve this in advance)
Start Your Kitchen Demolition
Before Demolishing Your Kitchen – A Checklist
Before you run off to start your project, take a final moment to reflect on the tasks you need to complete. The following checklist is a quick reminder of what you need before beginning your kitchen demolition.

Do you feel like you need further assistance? After completing over 50,000 projects, CliqStudios is ready to help you have a successful kitchen renovation. Take the first step towards your dream kitchen today.


